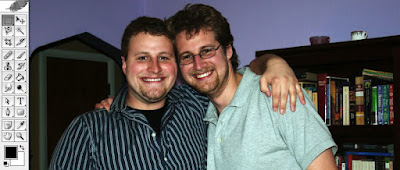
Justin and Me
But no matter how good we look, the background just isn't up to par. But how to cut us out so people can focus on the important part of the image: us. Well, I could use the Lasso tool, or even the Magnetic Lasso, but I want something more; something with more control, more precision, and more awesomeness.
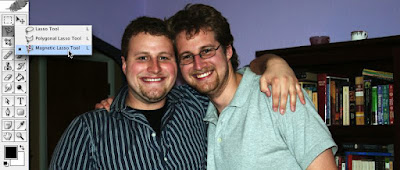
Magnetic Lasso
The tool I need is the Pen Tool.
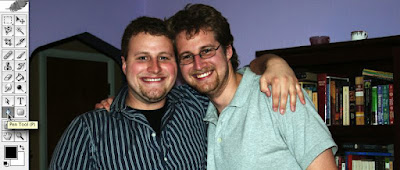
Pen Tool
Zoom in and click next to my arm. Then click and drag (while still holding down the button) farther up my arm. This gives you your first "Bezier curve" which you can then modify.
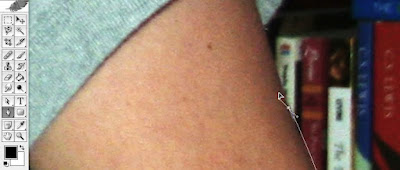
Bezier Curve
Always, always click and drag when you put down a new anchor point so you can modify the curve. If you don't drag, you won't have the two handles to move. You can move the anchor point with your cursor if you hold down Control (Command on a Mac). You can adjust the handles by holding down Alt (Option). Play with those to get a feel for what happens.
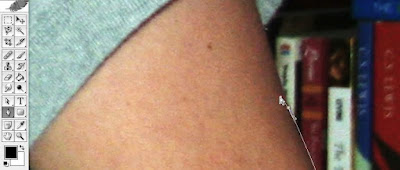
Move Anchor Point
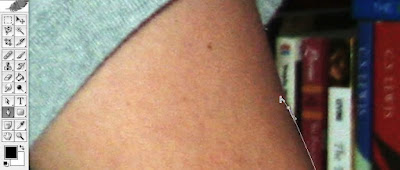
Adjust Handles
Now just start placing anchor points around your object (in this case, my arm and shirt). Remember to click and drag a little with each new point. You can adjust both of the handles on your new anchor point, and also go back and play with one of the handles from your previous point.
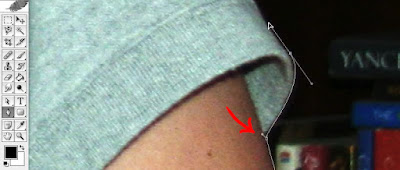
Handles
Hair is often the hardest part of cutting out a human. Since I know I'm ultimately going for a black background, I'm not being too careful.
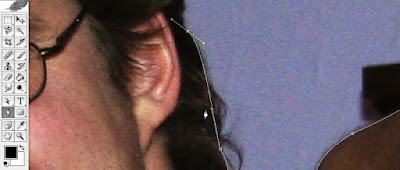
Hair
After you have made it all the way around your object, right click and select:
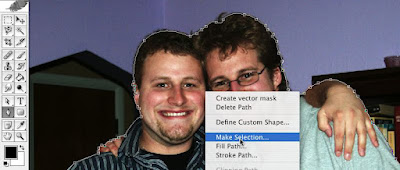
Make Selection
You can now choose to add a feather to your selection, but I do not at this step. I want to leave a copy of my cutout layer intact in case I ever want to go back to it again.
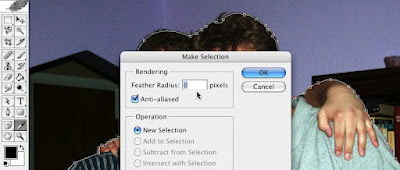
Selection Feather
Always copy your layers at every step.
Copy your selected layer, turn off all the other layers by clicking the little eye icon next to them, and paste your cutout into a new empty layer. Then, create another empty layer behind it and flood fill black.
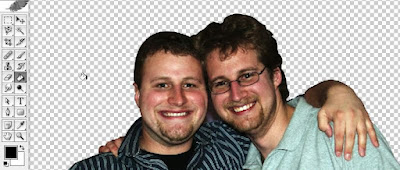
Empty Cutout
Hmm... that doesn't look so good, so make a copy of your cutout layer and use the Magic Wand tool to select the empty space around your object.
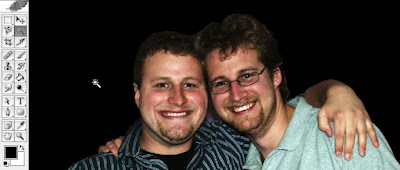
Magic Wand
Then go to Select->Feather
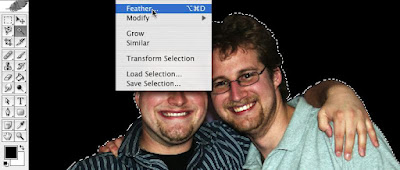
Feather
And depending on how big your image is, choose an amount:
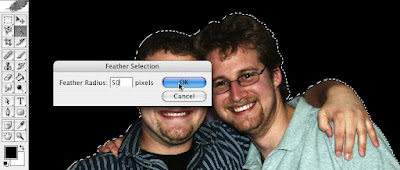
50 Pixels
Hit the Delete key once or twice, and you have a nicely blended image:
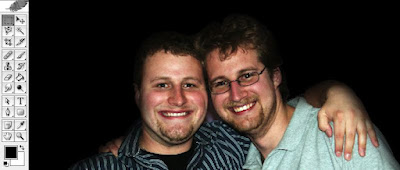
Beautifully Blended
That's the basic idea of cutting out objects with the Pen Tool. This tutorial assumes you already know about layers and the general operation of Photoshop. If you want more introductory tutorials, click on the Tutorial label on the right.
As always, if you have questions, please ask away and if I can't can answer it in the comments, I'll create anther tutorial addressing your issue.
~Luke Holzmann
Your Media Production Mentor

No comments :
Post a Comment