The following tutorial will show you how to create an incredibly easy, inexpensive, portable dolly for your video camera and tripod. This dolly is designed for the following needs:

Easy I needed something that did not require fancy tools. I did not want to drill through metal, solder, or do anything else that required specialized stuff.

Inexpensive I wanted parts I could find off the shelf at a hardware store. Materials are always pricey, but I needed a DIY that did not break the bank.

Portable All the plans for DIY skateboard dollies I found online were solid structures that would be impossible to transport without a truck... and would certainly take up too much space in my basement. I needed something I could collapse and toss in a backpack if needed.
Armed with those criteria, I spent two days scouring the internet for ideas and another six hours wandering the aisles of my local hardware store. I have been using this dolly for over five years. It works well. I have never seen anything else like it [though, I've since discovered a PVC Dolly that would probably work well for light cameras and would be even cheaper]. Here's how to build one yourself.
Stuff you need

Parts for your DIY dolly
- 8 x skateboard wheels with bearings (got two cheap skateboards at a big box store)
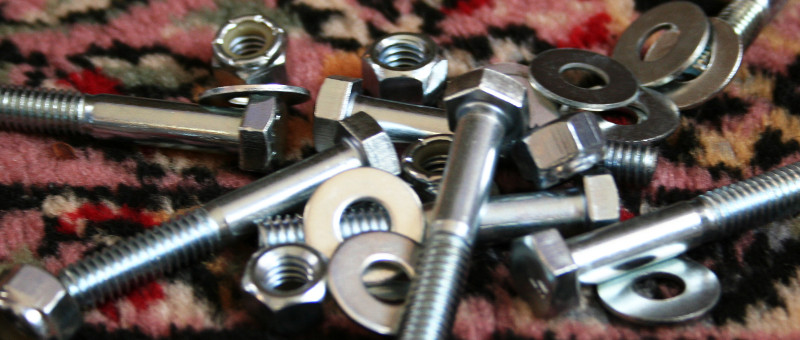
- 8 x 2" long 1/4" bolts
- 8 x 1/4" hex nuts
- 16 x 1/4" washers
- 2 x 3/4" T-joints of galvanized steel
- 2 x 3/4" elbow joints of galvanized steel
- A two foot long 3/4" galvanized steel pipe
- A 12.5" steel slotted angle [long wall-mounting L-bracket with holes it in]
- A 3' steel slotted angle [1.25" x 1" angle]
- 2 x 1" PCV pipe (10 feet long)

You will also need:
- Metal binding glue
- Socket wrench
- Crescent wrench
Putting it together

Step 1: Thread a wheel onto a hex bolt and then add two washers. Slide this through the outermost round hole in the steel angle and secure with a hex nut. Repeat 7 more times. Put two wheels on each end of the steel bar. Thankfully, the holes are offset so they won't bump into each other.

Step 2: Glue a T-joint to the middle-ish of both slotted angles. Try to keep it pointed straight up so when you attach the elbow they point straight across toward each other. Do not attach the elbows until the glue is set!

Step 3: Screw the elbows into the top of the Ts and connect the two tracks with the connecting steel pipe. Place each track on one of the PVC tubes, and you're good to go.

Using your dolly
You can quickly take this apart by unscrewing the center bar. Then, the largest pieces are the lengths of PVC. If you need to travel to a location, buy two more PVC pipes there. It's well worth the $5 to make it more logistically feasible.The PCV can move around as you slide over it. This flexibility is great if your dolly isn't perfectly assembled.

I've found that the bolt placement is almost perfect for my tripod feet.

If you need a low shot, you can swap out the pipe for a board with notches cut out for the T-joints.
Questions? Let me know in the comments and I'll try to address them or improve this tutorial so you can more easily build your own dolly.
~Luke Holzmann
Your Media Production Mentor

No comments :
Post a Comment